Posts

Showing posts with the label Year 2

Toolkit #2: Submission Post & Reflective Statement.

Character Production Bible: Toolkit #2 - Character Prod... by Jasmine Masters See Basecamp for cleaner PDF version^ Character Design Project: Class Work: Lesson 1: https://jasminemasterscaa.blogspot.com/2020/10/character-design-session-1.html Lesson 2: https://jasminemasterscaa.blogspot.com/2020/11/character-design-session-2.html Lesson 3: https://jasminemasterscaa.blogspot.com/2020/11/character-design-session-4.html Lesson 4: https://jasminemasterscaa.blogspot.com/2021/01/character-design-session-5.html Lesson 5: https://jasminemasterscaa.blogspot.com/2021/01/character-design-session-6.html Animation – 5 Poses x2:               i. https://jasminemasterscaa.blogspot.com/2020/10/moom-action-poses.html               ii. https://jasminemasterscaa.blogspot.com/2020/10/week-2-act-moom-relaxed-poses.html Moom Weight Lifting: http...

Toolkit 2: Pipeline 1 - Jetpack Jones Pt 2.

Continuing on with Jetpack Jones Head modelling , I finished off the rough blocking and moved onto completing the mouth and eye sections of the face. Pipeline 1 - Head Modelling P2 by Jasmine Masters

Toolkit #2 - Production Bible Submission.

Image
Complete Character Production Bible. Toolkit #2 - Character Prod... by Jasmine Masters Clean Concept Art: St Paul's - The Night of the Air Raid. Raymond's Home.

Production Bible: Raymond's Home Concepts and Storyboard Outline.

Image
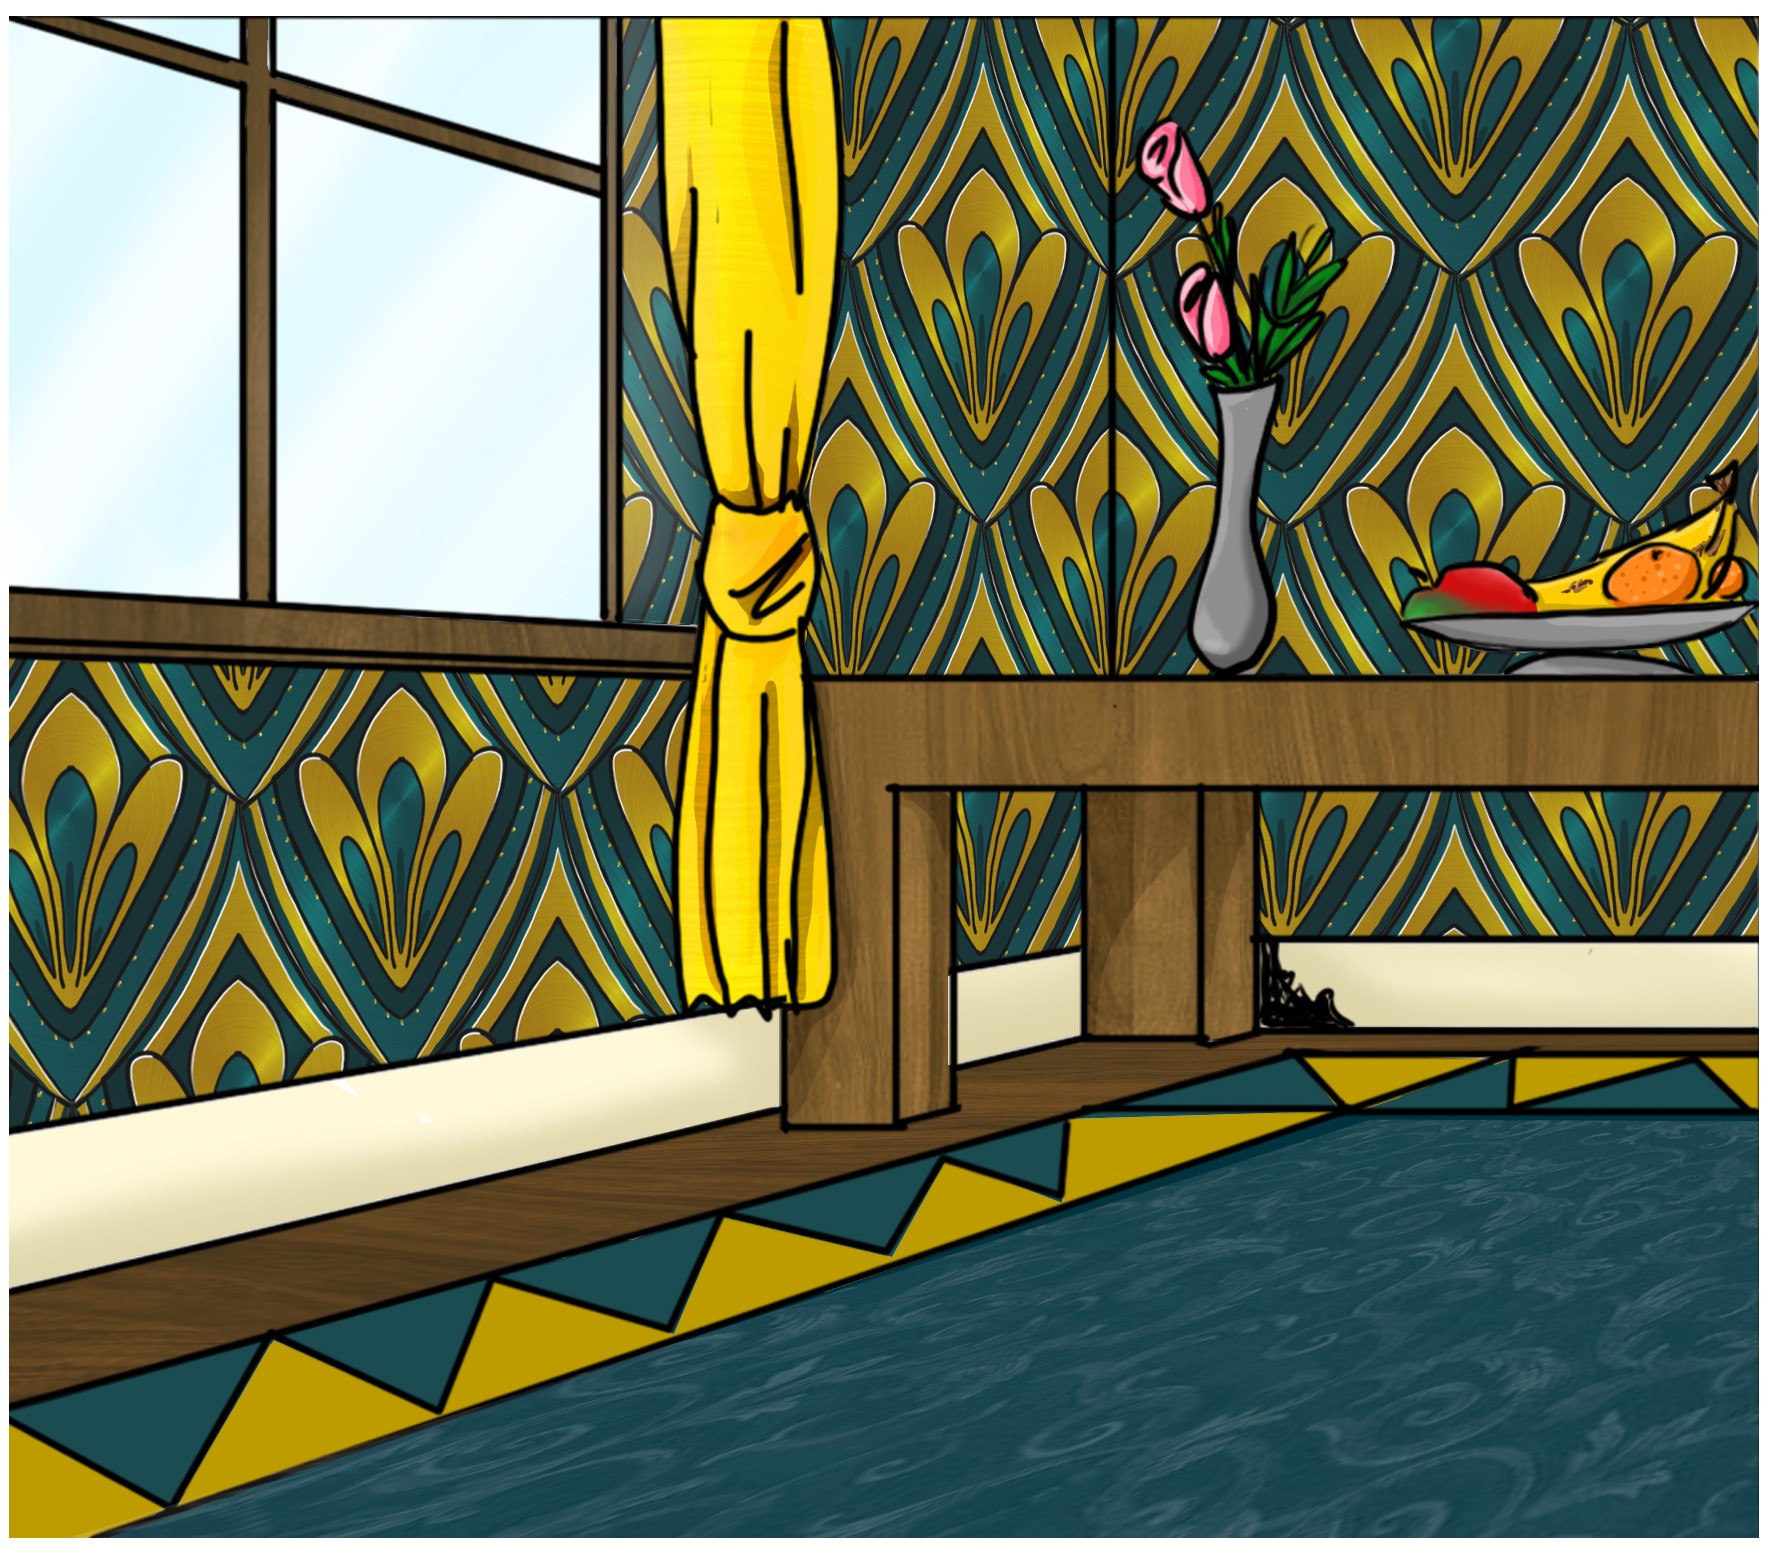
Continuing on with the character design project, I proceeded on to creating further set concepts, set plans and storyboards. To start with I looked at creating the human counterpart set concept with the entrance to Raymond's home hidden in the corner hidden behind the table. Taking influence from the Art Deco period I tried to embody that aspect through the geometric rug and the repeating pattered wallpaper with use of a minimum of 3 colours to keep with the simplicity the period brought to the home. Below that there are set plans for Raymond's home, showing a side and top view of the wall cavity in which he lives. Human Home Concept. Set Plans: Side (Left) Top (Right). From there I began designing some miscellaneous objects that would be found in his home and the ways in which he may use said objects. For example; his bed would be made from a sardine tin with the addition of cotton wadding, scrap material and matches/ an old shilling to make up his headboard. Another wou...

Character Production Bible: Update.

Image
Over the pass couple of months I've been continuing to work on the character design project ; in amongst others, to help round it off. Since the check-in I've been working on finishing of the St Paul's concept as well looking at to add in the gesture sheets for both my characters along with adding in the animation layout. Design Concept 1 - St Paul's. Animation Layout: Camera starts zoomed in on crack in the lamp post base. Raymond and Melvin emerge from crack and move out into the open to look up at St Paul's. Camera pans left to follow movement. Raymond points up at the cathedral, Melvin is in awe. As Raymond points camera zooms out and the audience see what Raymond is pointing at. Gesture Sheets - Raymond; Melvin: Raymond and Melvin Together.

Toolkit 2: Life Drawing - Back to Basics.

To catch up on missed out sessions of life drawing over the past year due to Covid, this past week (24th - 27th May) has been filled with the opportunity to catch up and get back to basics by putting pencil to paper.  I have found this past week to be quite refreshing by being able to get away from the computer screen and actually draw something on paper rather than by a graphics tablet. Throughout this week I have looked at exploring the human form through tone, shape, mark making and colour. When I first started drawing this week, I found I was a bit ‘rusty’ in some of the forms and shapes I was creating, but feel that over the past week I have gotten better at the seeing aspects of the human form and relaying what I’m seeing in real life to paper through observation and repetition of shapes. Life Drawing. - Catch Up. by Jasmine Masters

Premise: Reflective Statement.

Image
For the Premise Project, we could have free rein to create and design anything we wanted and transition this into a short animation using the medium of 3D software and storytelling. Initially I was a bit lost on where to start/ take my project, usually because I would have the cushion of a set brief to fall back on to help guide my ideas. With this project however I have found I needed to find my own voice and push myself to come up with something that I could see possibly taking into the third year to work on and build up to a final outcome that I would be proud of. To begin with I thought of setting my project around an old folktale and using that to incite my work, but found I was struggling to find one that appealed to me and could be made into and animated short. But with further talks with my tutors, peers, friends and family I found I really liked the idea of storytelling through world building and drawing on real world events to help influence my ideas and designs as well as ...

Premise: Submission Post.

Image
Pre-Vis - 3D Animatic. Crit Presentation: Premise: When We’re Gone- C... by Jasmine Masters When We're Gone - 'Art Of': Premise: When We’re Gone - ... by Jasmine Masters

Premise: Initial Propaganda Poster Designs.

Image
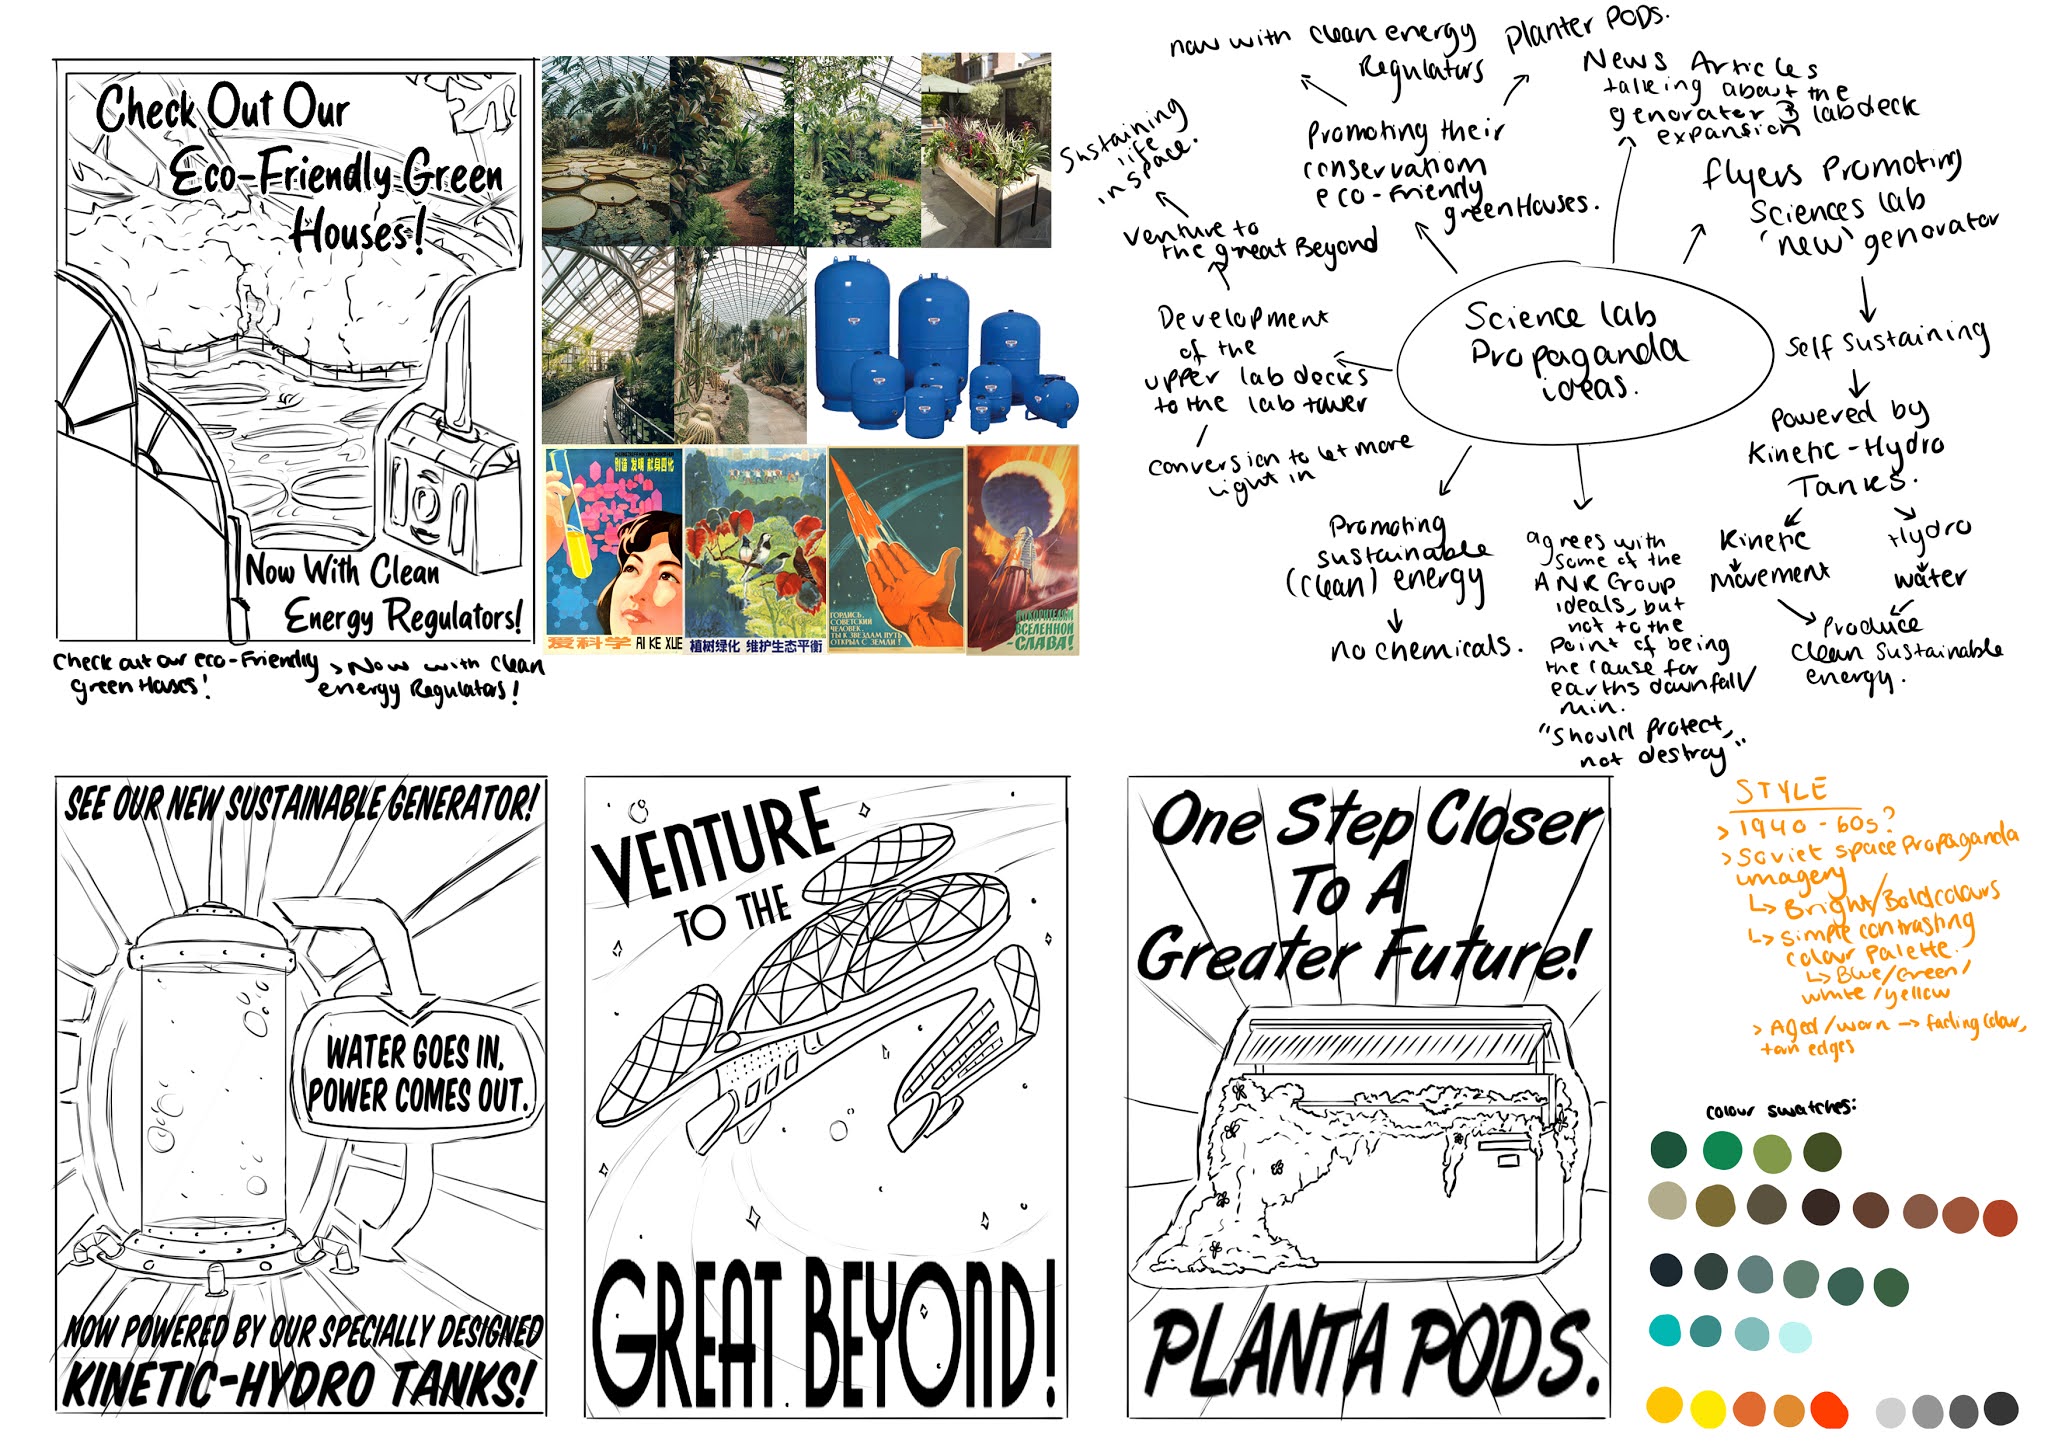
Moving forward with designs for the environment I am creating, I looked at developing some propaganda posters for the Science Lab and The Anti-Nuclear Regime (the ANR). For this I looked at a lot of Soviet space propaganda that was around in the 1950-60s where new developments in space travel were just becoming known. Here I also looked at the types of propaganda that we against the Atomic Bomb and used the tension and drama each poster embodied to fuel my ideas for The ANR campaign designs; aiming for a dark apocalyptic mood to in still fear in society. On the other end of the spectrum, for the Science Lab I looked at creating a lighter mood it it's ANR counter part. With this I looked more at science propaganda that emboldened and encouraged science, as well as looked at conservation posters to combine with the science theme and support what the Lab does (environmental research and conservation). Premise: Propaganda Visual ... by Jasmine Masters Below are some of the...

Premise: Update - Modelling Rough Sets and Assets for Pre-Vis.

Over the past couple of weeks, I've begun modelling in Maya the needed sets and assets to build up the main scenes as shown in my animatic. Using the drawn animatic designs as reference for what is needed in each set I begun constructing each environment Premise: Rough Mock Up Sets... by Jasmine Masters With these rough 3D sets it will enable me to get clearer idea of camera direction within my scenes for the 3D animatic, as in the 2D animatic in some places the camera movement isn't very clear.

Toolkit 2: Lip Syncing Pt 4 - Adding Head Transition Movement, Blinking and Clean Up.

Image
This week we looked at finishing up the Predator lip sync animation. This consisted of adding in the head transitions from the locked blocking poses from last weeks work, as well as looking to add in some blinks throughout the clip to help the character seem more alive. Once the head transitions and blinks were added, I then looked at cleaning up the animation curves in the graph editor. Toolkit 2: Lip Syncing Pt4 by Jasmine Masters Head Transitions: Adding the Blink: Clean Up:

Toolkit 2: Lip Syncing Pt 3 - Adding in Eye, Brow and Head Movement.

Image
This week we looked at adding in eye, brow and head movement to the lip syncing 'predator' clip. This consisted of double key framing (locking like steeped key frames) sections of the clip where we wanted brow or head movement and then going back and adding in the in-betweens to help the transitions between the locking poses (head movement in-betweens are to come later). Lip Sync Pt3 by Jasmine Masters Eye and Brow Movement: Head Movement:

Toolkit 2: Lip Syncing Pt 2 - Adding in Phonemes/Visemes and Tongue Movement

Image
In todays lip syncing session, we looked at adding in further movement to the mouth. This was done by thinking about the phonemes/ visemes we make when we talk to add a more precise movement to the lips. In addition to this we also looked at adding in pressure to certain words and looked at tongue movement within the mouth and where the tongue catches on sounds. Lip Syncing Pt 2 by Jasmine Masters Tongue Movement: Phonemes/Visemes and Tongue Movement Outcome:

Toolkit 2: Lip Syncing Pt1: Jaw Bounce.

Image
This week I looked at lip syncing. With this I looked at animating the Jaw Bounce to piece of audio from Star Trek: Generations (1994). This involved moving the lower section of the Jaw on the Moom rig to mimic the open and close motions of speech and making sure to thinking about how the mouth moves to produce sounds and words. Using the thought process of how the Muppets 'bite' words to seem like they are alive and talking; to the added knowledge of Phonemes and Visemes to help inform lip movements and the sounds we make. Phonetics: Mouth Movement & Prepping for Posing. Toolkit 2: Lip Syncing Pt1 by Jasmine Masters Lip Sync Blocking Outcome:

Premise: OGR.

Image
Premise OGR: Work so far. Premise OGR by Jasmine Masters Script: Premise Script V3 by Jasmine Masters 2D Animatic: No Sound.

Premise: Script, Storyboards and Animatic.

Image
 Using my existing concept work , I began to create a script to work from for the 2D Animatic. Making sure to note key characters, assets and locations. With this I also Created 'Camera Profiles' to help envision and understand the characters living in this world I am creating. Script: Premise Script V3 by Jasmine Masters Camera Profiles: Premise: Camera Profiles by Jasmine Masters on Scribd I then moved on to creating my storyboards with the use of the script to help inform what's going to be in each shot. (camera directions are in red) . Storyboards: With the storyboard complete I then moved onto creating the animatic in Premiere Pro. Animatic:

Premise: Camera Direction & Set Development.

Image
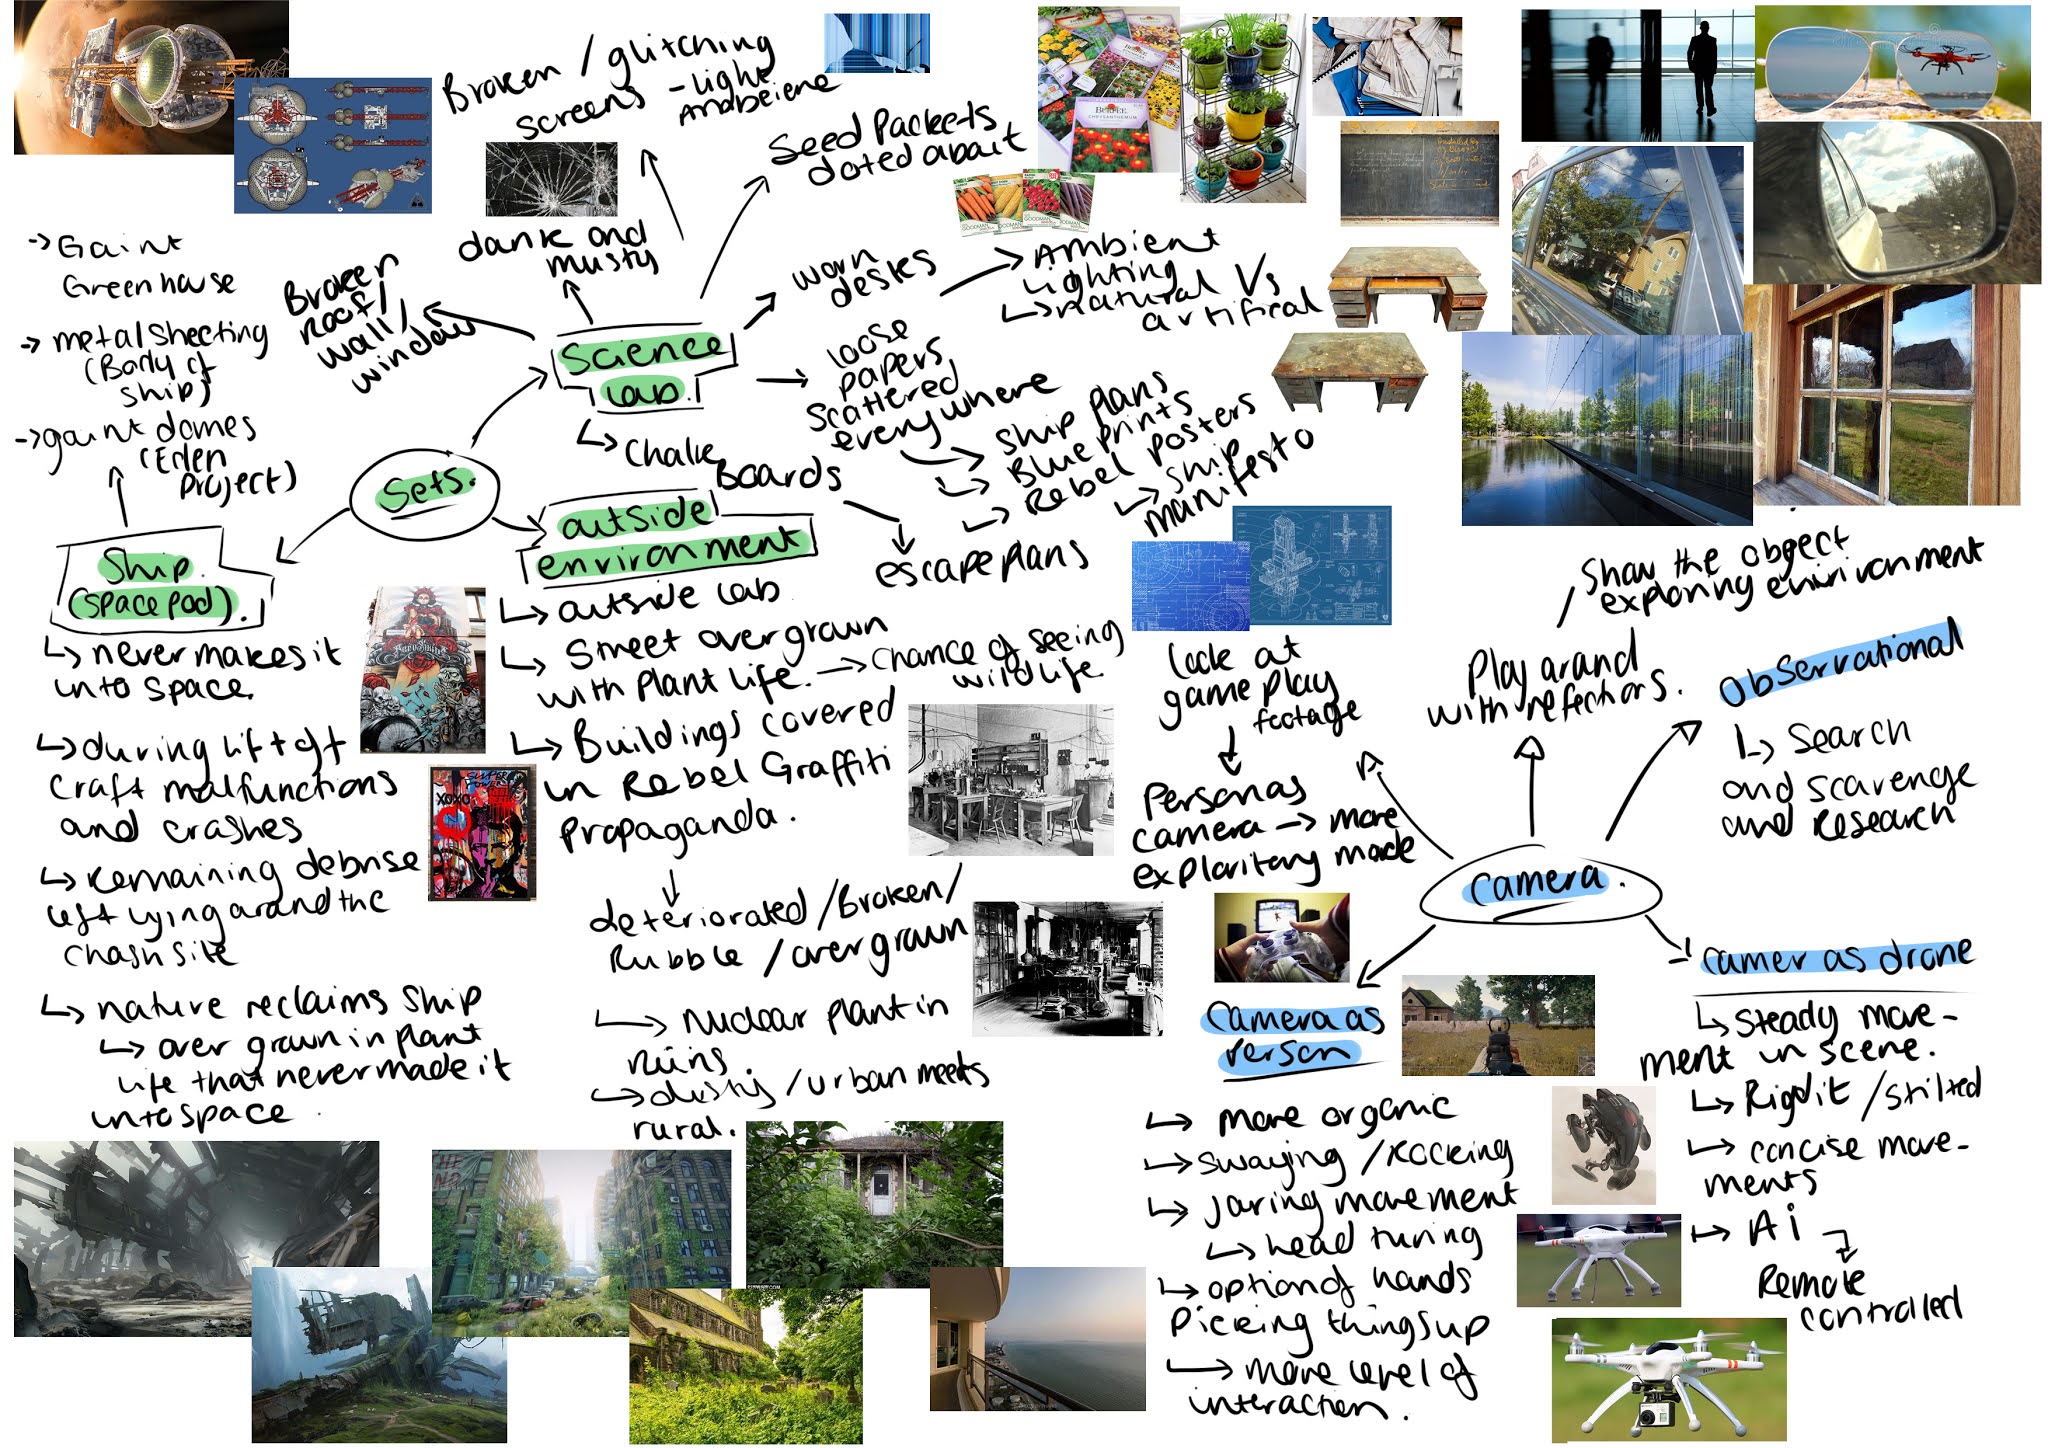
Going off the mind map I came up with I started to design some layouts and and sets for this post nuclear world to exist in. Before I started to sketch out some scenes, I looked into how I want to shoot the environment I am creating. As seen above in the mind map I contemplate either shooting through the frame of using the camera as a person or using the camera as a drone in an observational piece to explore the set/world created. In the end I've decided the camera would be a mix between a person and drone point of view. So, the pair would travel through the decrepit city scoping it out to see what remains and to try and find out what happed there. I plan for the key focus to be solely on moving through the damaged city and into the science labs where the scientists are planning their escape showing a generator room, plans for the conservation ship and hub pods for growing plants. Ultimately leading to the camera coming across a break in the labs window to see the conservati...

Sessions with James #4 - Continued Animation #2 with the Ultimate Bony Rig.

Image
Continuing on from adding the in-betweens from last time. Here I looked at converting the stepped keyframes to splined and then in the graph editor looked at cleaning up the spline curves so there was no overshoot and to make sure the timing of the animation seemed right. Cleaning up Animation (partial from frame 0004 to 0095.) Clean Animation - First Pass ^^Some parts are a bit slow and need readjusting to help speed up segments of the animation and some parts need going over to remove any jerky/ jumpy movements as well as removing any further rigidity in the animated movements in the second pass.

Sessions with James #3 - Continued Animation with the Ultimate Bony Rig.

Image
This week we looked at adding in the in-between poses to our keyframe animations from last week. Here I added in the remaining keyframes from last week to help round off the sitting sequence. I then looked at adding in extra keys to help add weight and movement control to the sequence. Reference Footage: Final Main Keyframes Finished: Added In-Betweens to Key Poses: Isolated In-Between (Chair Swipe):