Posts

Showing posts from 2021

Modelling Drone 1: Pt2.

Continuing on with modelling Drone 1;  I looked at adding on the antenna base, Propeller casing, adjusting the base of the drone at the back and also looked at mirroring the current components and laying out some of the UV's. Modelling Drone 1: Pt2. by Jasmine Masters Modelling Drone 1: Pt 1. See here.

Minor OGR #3.

Image
OGR Check-in for the Minor Project - Progress so far. Animatic V1: Rough Camera Cut Animatic - No sound/effects. Animatic V2: Rough Camera Cut Animatic - No sound/effects.  Added in static shots in initial rough camera cut animatic. Animatic V3: When We're Gone Animatic with sound/effects. Ambient Sound has been added as well as some static effects to Pre-Vis, just need to source the voice overs needed to round off animatic. Minor OGR #3 by Jasmine Masters

Modelling Drone 1: Pt1.

Taking the Orthographs for Drone 1; I begun to start modelling the shell and foundations for the drone. Below show the Drone 1's Modelling development so far. Modelling Drone 1: Pt1. by Jasmine Masters

Shop Front Design Concepts and Orthographs.

Image
Moving on with the set design, I then began finalizing the look and feel of the some of the buildings I intend to have in my main street scenes; as well as including 2 miscellaneous buildings that I can then further modify to create other buildings to help fill out the street and add a bit more variety. For the buildings I was going for a run down weathered feel; with the idea of foliage and natural plant life taking over and reclaiming the town and it's surroundings. With the addition of dirt and moss I am also hoping to convey the age of the town, as well as incorporating small bits of graffiti to help imply its rough history with the ANR Regime. Shop Fronts 1 & 2. Shop Fronts 3 & 4. Miscellaneous Buildings 1 & 2. From these I also created orthographs from these designs, that I can then scale up and use to help when modelling to ensure I am getting the scale of the buildings right within the 'Maya World'. Shop Fronts 1 & 2 Orthographs. Shop Fronts 3

Drone Further Development.

Image
Continuing on the drone design process (see here ) I took on the drone I felt had the most potential to be a bit more interactive within the scenes and to help draw interest to certain objects/devices. Below I created a further 3 designs with some slight modifications and looked at adding in the arm and focusing on the way the arm will look/move with the drone  Since I intend to have 2 drones within my short, I looked at having a drone with an arm and one without to help imply that one drone is an older model and one is a newer updated version. Here I also looked at compressing the drone to be a bit more compact and appear less clunky, to do this I shortened the front face of the drone and rearranged the front components/add-ons.       In addition to this I also considered how the back of the drone could be used to identify the drone model as well at working out/adapting what the drones are going to be called. I then added some colour to further help round off the done concepts and

3D Pre-Vis Progress Pt2:

Image
Moving on with the 3D Pre-Vis I looked at adding in the static shots the initial rough camera cut animatic. Through doing so I found it has added some much needed pause within the scenes to help pair back the movements of the drones and gives the audience time to take in some of the environment in which the drones are exploring. 3D Pre-Vis Reviewed (Minor): Rough Camera Cut Animatic Version 2: No Sound. With the static shots now in place; I then turned to adding in some ambient sounds and simple effects to the animatic to add further interest and to help build the quite atmosphere an abandoned town may inherit from lack of human life..  When We're Gone Animatic Version 3: with Sound. With this animatic, it has given me a clearer understanding of how I will shoot my final film. Taking into account the various camera movements and shot types; by doing this it should hopefully help better guide me in what to animate and the amount of frames that are needed for each scene,

3D Pre-Vis Progress.

Image
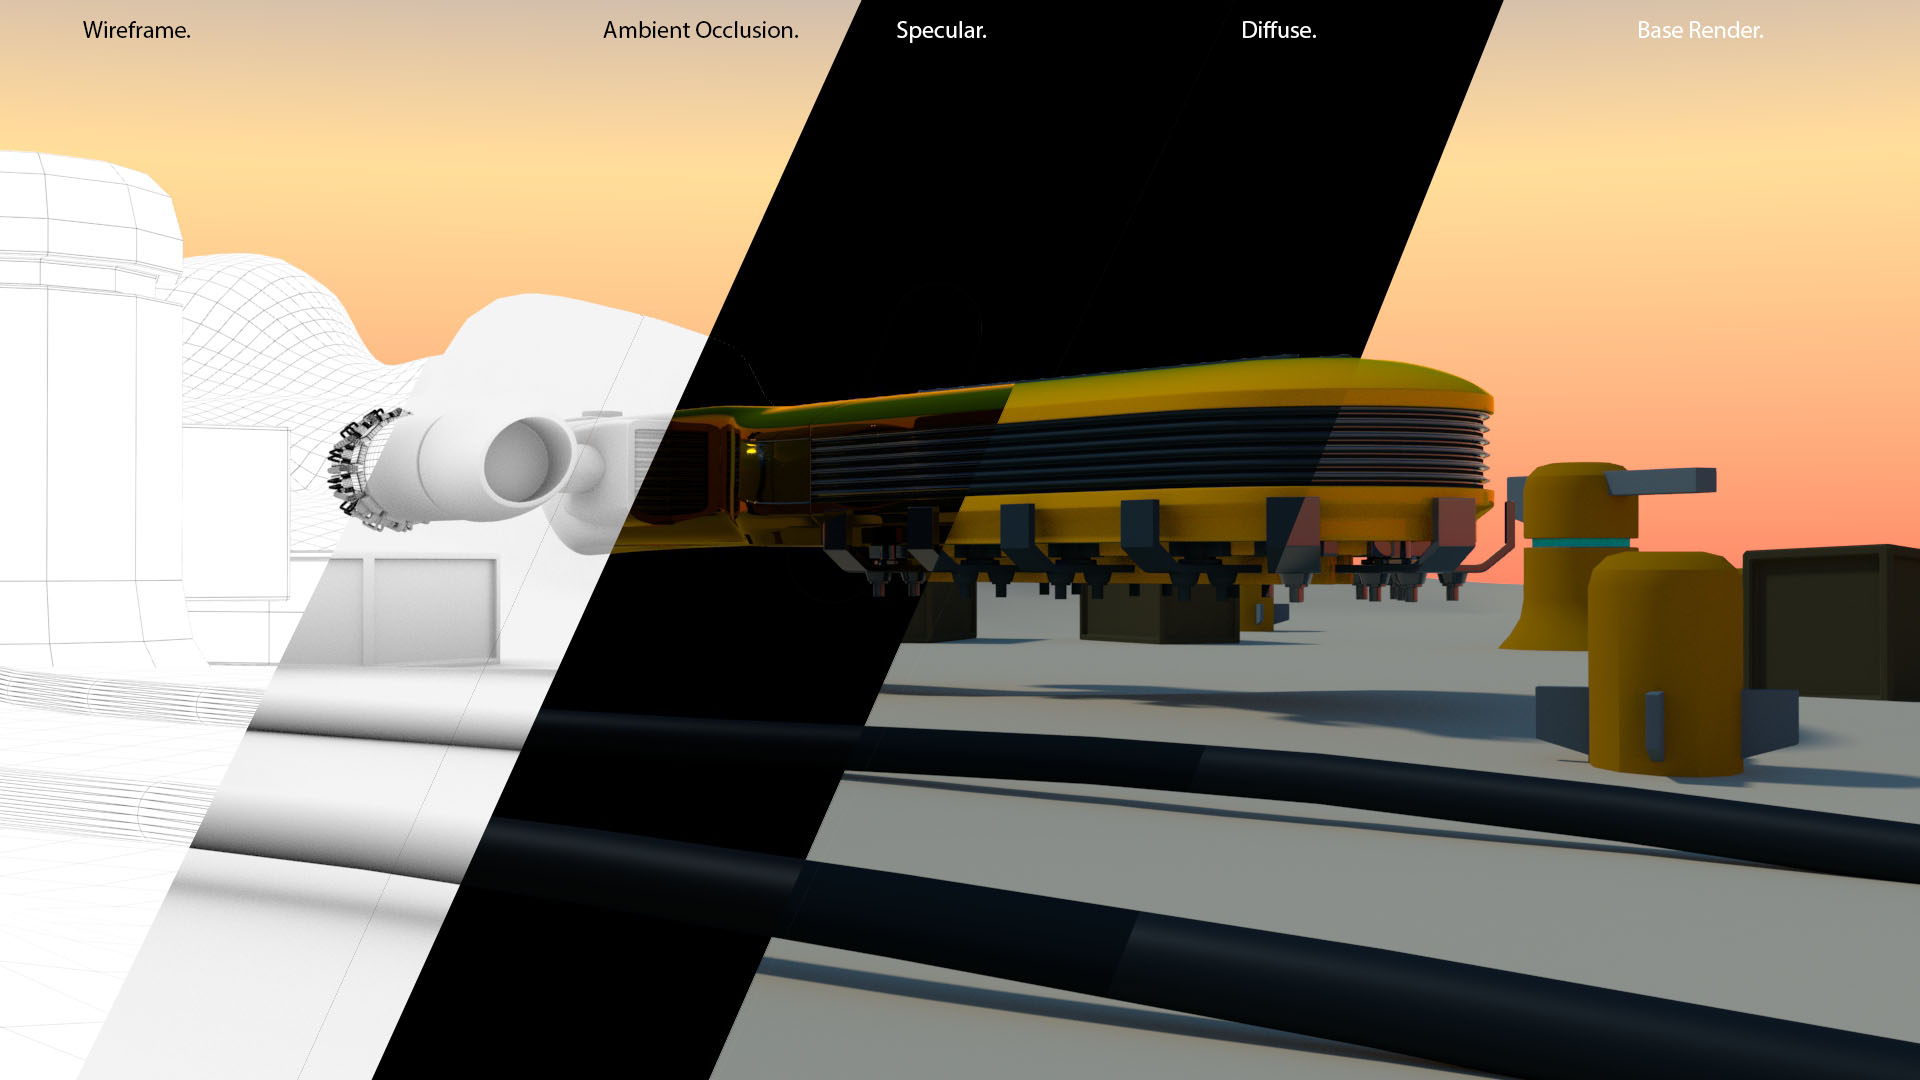
Continuing on with reworking my initial Pre-Vis and using the plan I previously created, I Begun to re-shoot my scenes with the improved sets. With these new scenes shot I then started to compile and edit my shots together to create a more coherent camera flow. 3D Pre-Vis Reviewed (Minor): Rough Camera Cut Animatic - No sound, No effects: Reflecting on this rough camera cut animatic (and through talking to my tutor), it was said that there are still areas where the camera movements are still too erratic and that there were areas where the camera pauses are too long, creating a disconnect in the camera flow. To amend this it was suggested that I add in some Static Shots featuring just the drones interacting to help cut down on some of the camera movement within the scenes. This should then hopefully create a bit more variety in camera shots so there's not this continuous camera movement and allow for the audience to actually see some of the sets environmental details and drone

Minor OGR #2

Image
OGR Check-in for the Minor Project - Progress so far. Minor OGR #2 by Jasmine Masters When We're Gone - Rough Camera Cut Animatic - Work-in-Progress.

Initial Drone Design.

Image
Taking on board the changes I wish to make when filming my short (see here ), I begun to design some potential drone concepts that I could then take forward into a 3D space.  Drone Mindmap. With the drone I wanted it to be small and compact with a way to move about; either with turbines or wings and to have some sort of camera/screen to view it's surroundings, as well as have some sort of extendable arm to be able to move/nudge things. To begin with I began by creating random shapes and then using those to from the base shape of the drone. From there I picked the three I liked and then begun to further develop those designs, combining different aspects/ features from all three of the initial designs. Then I repeated this process to create a further six ideas. With this I found the top row of drone designs to hold the small and compact look I am after, but find I will have to further develop where the extend able arm will be placed.

Minor Pre-Vis Sets.

Moving forward with the new set plans I began to remodel/adjust my existing sets to work with the new set flow previously put in place from reviewing my Premise animatic (see  Reviewing 3D Pre-Vis from Premise for more). With these temporary sets now in place I can begin to roughly plan out my new camera shots when 'filming' my scenes for the new adapted Pre-Vis. Minor Pre-Vis Sets. by Jasmine Masters

Reviewing 3D Pre-Vis from Premise.

Image
Progressing on with the Minor project and reviewing my Premise work, I've gone back to my previous 3D Pre-Vis I created in Premise and have begun to better plan out the camera flow and the set layouts I intend to use in my final film. This included going back and considering how the cameras (in this case a drone) will move around the scene and capture the story I'm trying to create. In my initial Pre-Vis in Premise I moved the camera around the scenes to illustrate the direction in which I wanted my short to be filmed, however looking back on my pervious work I found the camera movements to be too erratic and fast paced in some places; creating more of a fly through the set rather than tell a story.      To help reduce the fast paced camera movements I plan to work in a second camera, as well as have at least one drone visible within the scenes to help direct the camera movement/audiences attention within the scene and to help add a bit more interest for the viewer. New 3D

Renewed Set Concepts.

Image
After reviewing my Premise work, I found my concept drawings lacking. So to help start off the Minor Project I began by rounding of the set concepts to help show a general idea of the type of scenes/sets I plan to use in the final shots when filming.  Here I started off by finishing the Lab Deck Desk concept by filling in the colour to help round off that concept. Lab Deck Continuation: Lab Deck Desk Outline from Premise Coloured Lab Desk - Back Lighting; Lighting based behind the Pin board Coloured Lab Desk 2 - Light changed to have slight light rays casting onto the desk. From there I then moved onto drawing out the rest of my concepts to help give me those working visuals to then refer back to when in Maya. This consisted of Harret Sets Main St, the Lab Deck's Shattered window and finally the Generator Hallway. Harret Set Main Street Concept: See shop design process here Lab Deck Shattered Window Concept: Generator Hallway Concept:

Maya Refresher #3: AOVs.

Image
AOVs – known as Arbitrary Output Variables - are essentially render passes/ render layers. With AOVs we can ‘break’ a flat image up into layers and then when compositing we can then either choose to take bits out or keep bits in. AOVs are typically saved out as EXR files (32-bit files) due to all the raw Data they contain within the layers.  To set up AOVs simply go to the render settings and open the AOVs tab. Below you will see two columns one side full of available AOVs and one side with Active AOVs, choose which AOVs you wish to use from the available column, select it and the click the two arrows >> to move it over to the active column. This will then remove those selected from the available column. You will then be able to see the active AOVs when you open the rendering viewport. Render Setup:  Creating override materials that only show in the render view. 1 Base: Set up Skydome and directional light. Ambient Occlusion: Material override from Render Setup Wireframe: Mater

Maya Refresher #2: Fog and Atmospherics.

Image
In Maya there are two types of fog that can be used within a scene the first being Ai fog (Legacy), which is the older version of creating fog in a scene, this fog uses a directional light and doesn’t tend to interact the lights in scene and usually tends to white wash the scene as it simulates a very dense fog. The second is by using Atmosphere Volumetrics’ called AiAtmosphereVolume which is the newer version to the legacy fog system. This fog does interact with the lights in the scene and therefore creates more accurate/ detailed fog and interest within the scene. To get fog set up within the scene open the render settings and then go to the Arnold menu and down to environment tab. Click the checker next to atmosphere and select the fog you wish to use.  AiFog (Legacy). Added directional light to scene. Added AiFog Changed colour of fog. AiFog Composite Outcome. AiAtomosphereVolume. Added in spot light - Alternatively I could have added in a area or a point light as well to ac

Minor OGR #1.

Image
OGR Check-in for the Minor Project - Progress so far. Outcome Proposal here . Minor OGR by Jasmine Masters Clearer Set Concepts: